Creating a Capture Engine capture window
Creating a Capture Engine capture window lets you capture traffic remotely from an unlimited number of distributed Capture Engines. Capture Engines can perform real-time network analysis on traffic from one or more network interfaces, including Ethernet, 802.11 a/b/g/n/ac wireless, 1 Gigabit, 10 Gigabit, 20 Gigabit, and 40 Gigabit. Capture Engine capture windows lets you capture and analyze data in real-time, and record data for post-capture analysis. Using Capture Engine capture windows, network engineers can record and monitor their entire enterprise-wide network and quickly identify and remedy performance bottlenecks, even those occurring at remote locations, without leaving the office.
To create a Capture Engine capture window:
1. Do one of the following to open the Capture Engines window:
• On the Start Page, click
• On the menu, click
The Capture Engines window appears.
2. Connect to a Capture Engine. (To connect to a Capture Engine, see Connecting to a Capture Engine.) The Home tab for the Capture Engine appears.
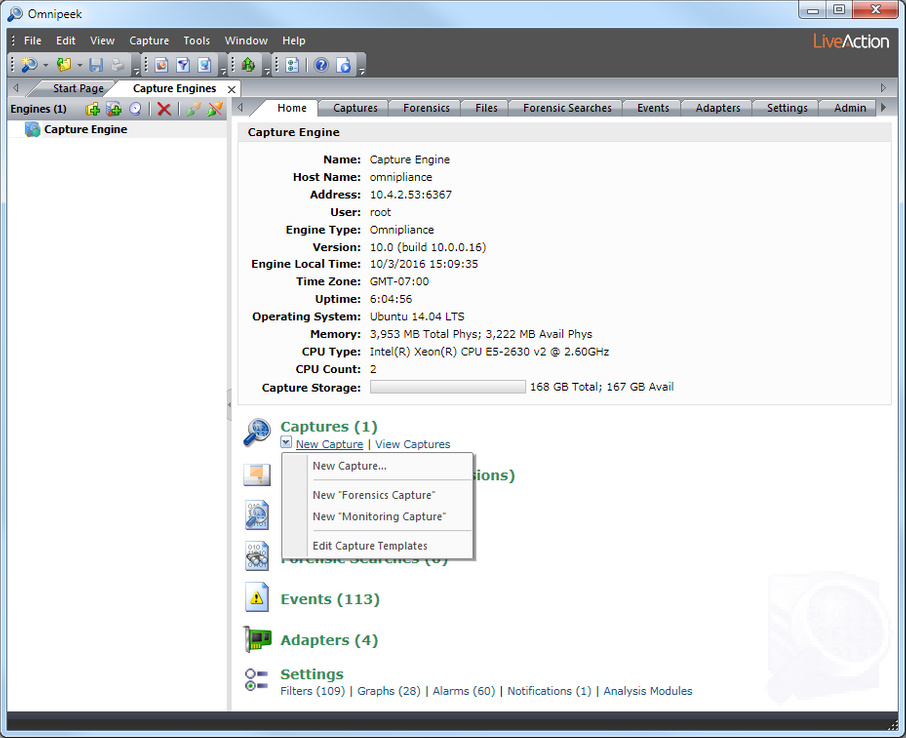
3. From the Home tab, click New Capture and select the type of capture window that you would like to create:
• New Capture…: This option lets you create a new Capture Engine capture window based on the capture settings that you define. See Configuring capture options.
• New “Forensics Capture”: This option lets you create a new Capture Engine capture window based on a forensic capture template configured for post-capture forensic analysis. See Forensics capture on a Capture Engine.
• New “Monitoring Capture”: This option lets you create a new Capture Engine capture window based on a monitoring capture template configured to view higher level expert and statistical data in a continuous real-time capture. See Monitoring capture on a Capture Engine.
• Edit Capture Templates: This option opens the Capture Templates dialog and allows you to create new or edit existing capture templates. See Capture Engine capture templates.
The General options of the Capture Engine Capture Options dialog appears.
NOTE: You can also select the above options from the drop-down list available from the Captures tab, and from the New Capture options available from the Adapters tab.
NOTE: For a description of the other views available from the Capture Options dialog, see Configuring capture options.
6. Click . A new Capture Engine capture window appears.
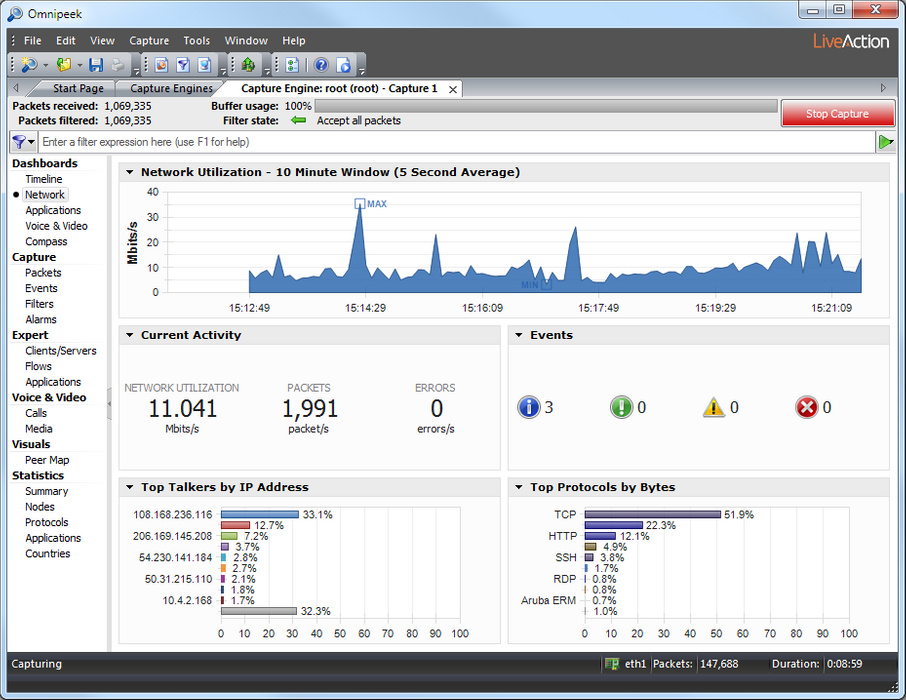
See Capture window views to learn more about the different views available from the navigation pane of every capture window. See Navigating a capture window to learn more about the parts of the capture window.